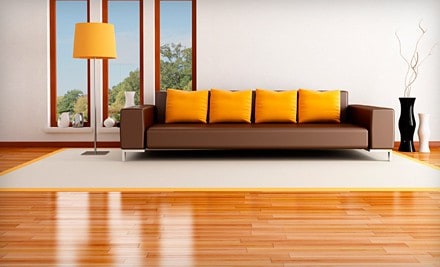
From famous locations like the Museum of Modern Art and Carnegie Hall in New York, NY, to local YMCAs and office buildings, hardwood floors can bring life, beauty and warmth to any space. Yet over time, a hardwood floor may begin to show its age with scuffs, scratches and wear spots. Whether you are caring for a floor that’s part of a building housing great works of art or a floor in an elementary school gym with lots of wear and tear, a hardwood floor should be built to last. However, sometimes it takes some work to ensure a floor looks its best.
Below are six steps a facility can take to spruce up an aging floor and make it look like new.
Step 1: Assess
A floor that has received regular care and maintenance can likely be brought back to a beautiful shine with a simple buff and re-coat, which can remove scuffs or very minor scratches. Yet there are occasions when a floor needs to be totally replaced or refinished. Floors that have fallen victim to significant water damage, deep scratches that have penetrated the finish, broken boards or stains will require full refinish or replacement to bring back shine. If possible, know what types of cleaners, chemicals and finishes that have been used on the floor in the past.
Step 2: Prepare
Ready your tools (such as abrasives, buckets, microfiber pads, cleaning solutions, auto scrubber, etc.) and either lock the doors or place signs at all entry ways to let occupants know the floor is off limits. Look for tools that are made for a hardwood floor re-coat process. The right microfiber pad, rollers and cleaning solutions will go a long way in making the job easy and quick. Additionally, be sure to select the appropriate finish for your needs. A water-based finish will offer a highly-durable floor with few volatile organic compounds and a rapid dry time.
Step 3: Clean the Surface
Next, remove any tape, gum or sticky spots from the floors as well as any furniture or objects. Starting with a clean surface will help the finish process go smoothly. Once the floor is free of any objects, dust-mop the floor with a microfiber dusting pad and then clean the floor with an auto-scrubber. Be extra thorough in both the dusting and cleaning process to ensure the floor is dust and debris free.
Step 4: Buff
After the floor is clean and dry, it’s time to buff. Buffing will provide a foundation on which the finish can adhere. Unlike sanding a floor, which removes a thin layer of the hardwood floor, buffing “scuffs up” the floor and removes the top layer of finish. Look for an abrasive product that offers a consistent scratch pattern across the entire floor. The buffing process can be a bit dusty. Using a dust-containment system will limit the dust or debris in the air. Additionally, after buffing, vacuum or dry-tack the floor with a fine microfiber pad, paying extra attention to edges and baseboards where dust can collect. Then, run the auto-scrubber one more time to get the floor extra clean. Once the floor is clean, tape off any floor plates or areas that you do not want the finish to get on.
Step 5: Apply the Finish
Prepare the finish exactly as directed on the label. A plastic watering can is an inexpensive tool for pouring the finish easily and mess-free. Plan your exit before starting and be sure to end the process in a low-visible area, as this can be a place where the finish may not lay as evenly. Wet down all rollers with cold water and wring out excess water. Roll on the finish with the grain of the wood overlapping about 6 inches between passes. Once the first coat of finish is down, let it dry according to the product instructions. Most water-based finishes will dry within 24 hours. Allowing the floor to dry longer than 48 hours before applying a second coat will require another round of buffing, so be sure to read the instructions carefully. Note that a humid environment or cooler temperatures will slow down the drying process, while a dry environment or area with some air flow will speed up the dry time. Lay the second or third coat of finish just as the first. Allow the final coat to dry completely before allowing foot traffic or furniture back on the floor.
Step 6: Admire Your Work
The end result is a beautiful and durable floor ready for whatever comes along. Depending on floor wear and tear consider a re-coat every year to keep floors safe and looking great.
So how do you know when it is time to refinish a hardwood floor?
The re-coat process often provides opportunity to bring back the shine and luster of a hardwood floor. However, there may come a time when the floor needs the next level of care or it’s simply time for a new look. Know when to consider a full hardwood floor refinish.
– Is there lots of damage? A full hardwood floor refinish is ideal if the floor has high/low spots, deep grooves or gouges, or if the finish has worn down to the bare wood. Refinishing can also help repair some water damage like cupping or warped wood. Refinishing can also help repair some water damage like cupping or warped wood. Note that significant water damage may require the installation of new floor boards. Additionally, a floor refinish will erase stains that have penetrated the finish.
– Is it time for a change? A hardwood floor refinish is also an ideal time to change the color of a floor. A wide variety of stain and paint colors are available today as well as the ability to custom mix colors for the perfect floor.
Remember, sometimes refinishing is not possible. Know the type of wood floor you have as well as how many times it has been refinished. Many of the newer products have such a thin layer of hardwood that refinishing may not be possible. Additionally, knowing the type of wood will help to inform how you might refinish the floor.
EcoCare will provide a free quote on the best plan of action on renewing your floor. EcoCare services the Waco, Austin, San Antonio and surrounding cities.
Article by Dave Posey (Cleaning & Maintenance Management)